
Firstly, here's a quick video to show you how the deadline app works...
Detailed demo of how it all works (12 mins):
After the Deadline app has been installed, on any ticket, in the apps pane on the right, you'll be able to set a date and a time.
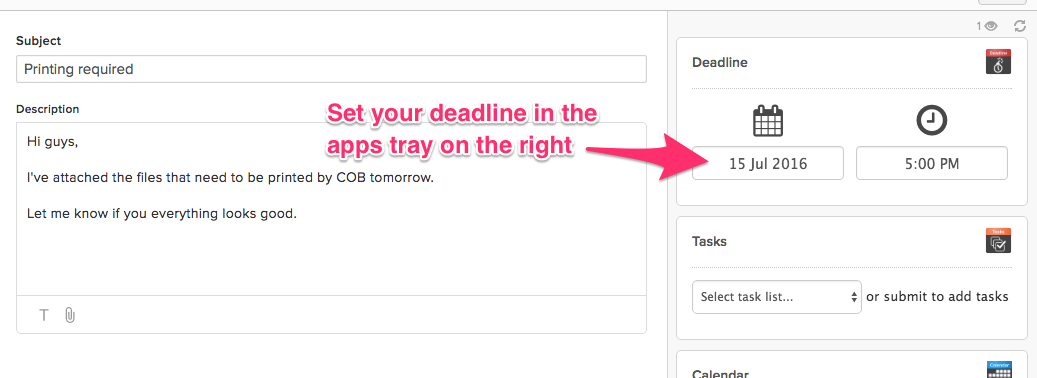
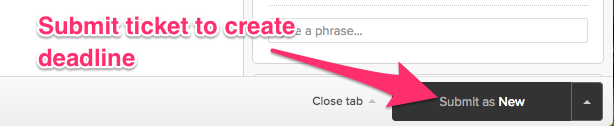
Once you've set the date and time, you'll need to submit the ticket by clicking submit at the bottom right-hand side of the screen.
Sidenote: You may be wondering which time zone your deadline will apply to. This is automatically set based on your own timezone settings. To change your timezone simply click on your picture icon at the top right-hand side of the screen. Then in the dropdown choose "View profile page". Then on the left, there will be a setting to change your timezone.
At the deadline, you'll see a popup notification appear for a few seconds in your agent interface that looks like this.

By default, your team will automatically be sent an email letting them know that the deadline has been reached.

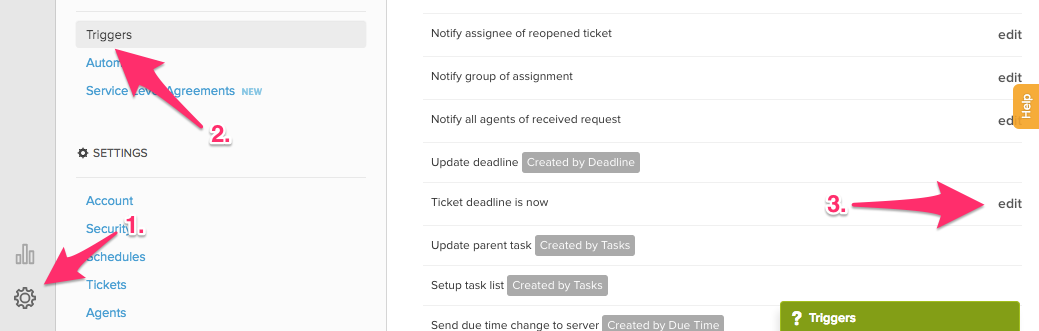
The email you and your team receive is sent by a Zendesk trigger called "Ticket deadline is now" which is created at the time you install the app. This means that you can alter the trigger to change what happens.

To alter the trigger, first, click the cog at the bottom of the screen. Then click on 'Triggers' and 'edit' next to the trigger called "Ticket deadline is now".
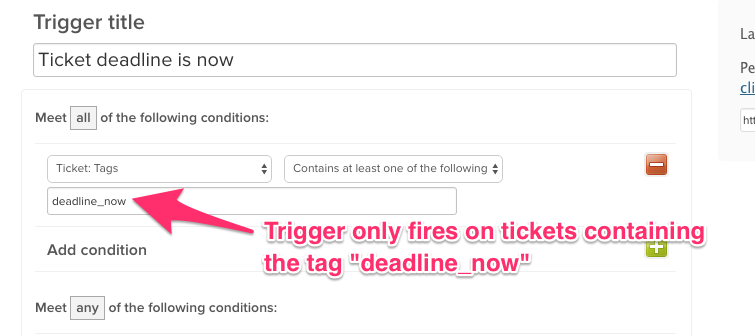
As you can see below the trigger fires when any ticket is updated with the tag "deadline_now". You don't have to alter this bit at all. However, so you understand why the trigger is set to look for this tag; it's because the Deadline app adds this tag to the ticket at the exact time of the deadline.
To change what happens when that tag is added scroll to the bottom and have a look at the section under "Perform these actions".
As you can see the rules are sending a message to the assigned team. You can change this to do whatever you want, for example, you may only want the email sent to the assignee, other specific agents or even change ticket fields, like escalating the priority. It's up to you.
Finally, at the bottom, you will see one last rule that removes the tag "deadline_now". This rule is super important because it stops this trigger firing over and over again, every single time the ticket is updated even after the deadline has been hit.
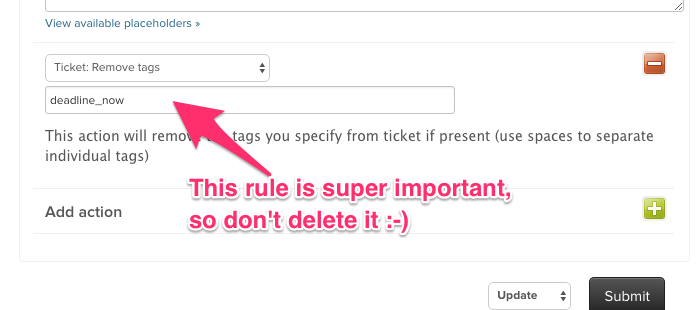
It's so important that we've put in this warning message:
WARNING, DO NOT DELETE THE RULE "Remove tags" - "deadline_now".
Basically, this rule ensures that the actions you want performed at the time of the deadline only take place once.
For more information on controlling workflows, you should continue reading here: https://support.sweethawk.co/hc/en-us/articles/235026968-Controlling-workflows-in-Deadline